马上注册,结交更多同城好友,享用更多功能!
您需要 登录 才可以下载或查看,没有帐号?立即注册

x
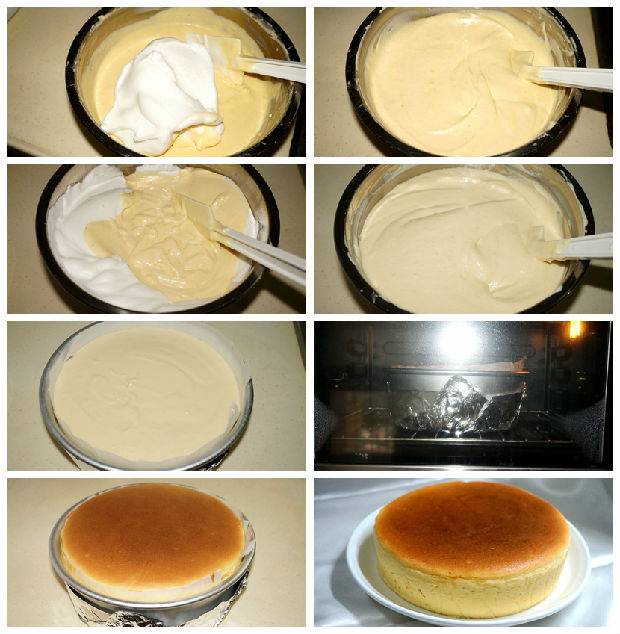
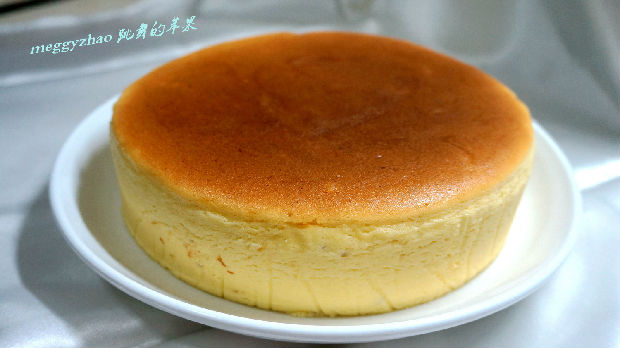
       全家人都爱吃榴莲 这次,超市里搞5折促销 早早地 我就相上了这个来自泰国的金枕头榴莲 只等促销的日期赶快来临 终于盼到这个日子了 平时 超市都是8点开门营业 这天 7:30就开门迎客了 虽然这北京 但爱吃榴莲的人确实不少 瞧这队伍就知道 榴莲在北京人民心里占据了多么重要的位置了 每人限购两个 一路上 闻着榴莲的香甜味道 终于到家了 拿出早就准备好的食谱 烘焙工具 一切准备就绪 开工啦!!  材料:榴莲240克, 奶油奶酪250克,细砂糖(奶油奶酪用)40克,细砂糖(蛋白用)60克,淡奶油200克,鸡蛋4个,低筋粉50克 制作: 1. 榴莲去核,加60克淡奶油; 2. 用料理机打成浆; 3. 蛋白、蛋黄分离; 4. 奶油奶酪放盆中软化; 5. 加40克砂糖; 6. 用电动打蛋器打发; 7. 加入蛋黄; 8. 打发成顺滑无颗粒状;  9. 加入榴莲糊; 10. 搅打均匀; 11. 加入140克淡奶油; 12. 搅打均匀; 13. 筛入面粉; 14. 搅拌均匀;  15. 60克细砂糖准备好; 16. 蛋白低速打出大泡时,加入三分之一砂糖; 17. 蛋白高速打出略有纹路时,加入三分之一砂糖; 18. 蛋白高速打至细腻有明显纹路时,加入剩下的砂糖; 19. 打至湿性发泡即可,即提起打蛋器头,蛋白呈弯曲的长钩; 20. 烤箱中下层放烤盘,内放热水,烤盘上再放一个烤网,开始预热,160度,上下火;  21. 二分之一蛋白糊入蛋黄糊中; 22. 翻拌均匀; 23. 将混合好的面糊倒回到蛋白糊盆中; 24. 翻拌均匀; 25. 蛋糕糊倒入围好油纸的模具中,震几下,震出大气泡; 26. 入预热好的烤箱,中下层,160度,上下火,70分钟左右,表面金黄色; 27. 时间到,不要急于出炉,在烤箱中继续焖15分钟左右,取出;不要脱模,待冷却后入冰箱冷藏4小时以上; 28. 脱模,撕去油纸,切块食用。  小提示: 1. 此方为8寸蛋糕一个; 2. 活底蛋糕模,底部和内壁周围都铺好、围好油纸,利于脱模; 3. 如果用直接水浴法,即把模具坐在水中烘烤,则在模具外面围上一层或两层锡纸,以防进水,那么烤盘也要选择深一些的,最好中途不要再开箱加水了;如果用间接水浴法,即模具不直接接触水,外面可围可不围锡纸;我用的是间接水浴法,也围了一层锡纸,但一点也没有面糊漏出,下次可以考虑不用围锡纸啦; 4. 蛋白打到湿性发泡即可,不要打到干性发泡,否则蛋白糊不易与蛋黄糊混合均匀; 5. 冷藏后食用,效果更佳;每切一刀,都要把刀擦干净再切下一刀; 6. 榴莲量可做调整。个人觉得这已经是最大量了,因为蛋糕切时湿度较大,而且入口即化。     
|